

My Hallway Makeover
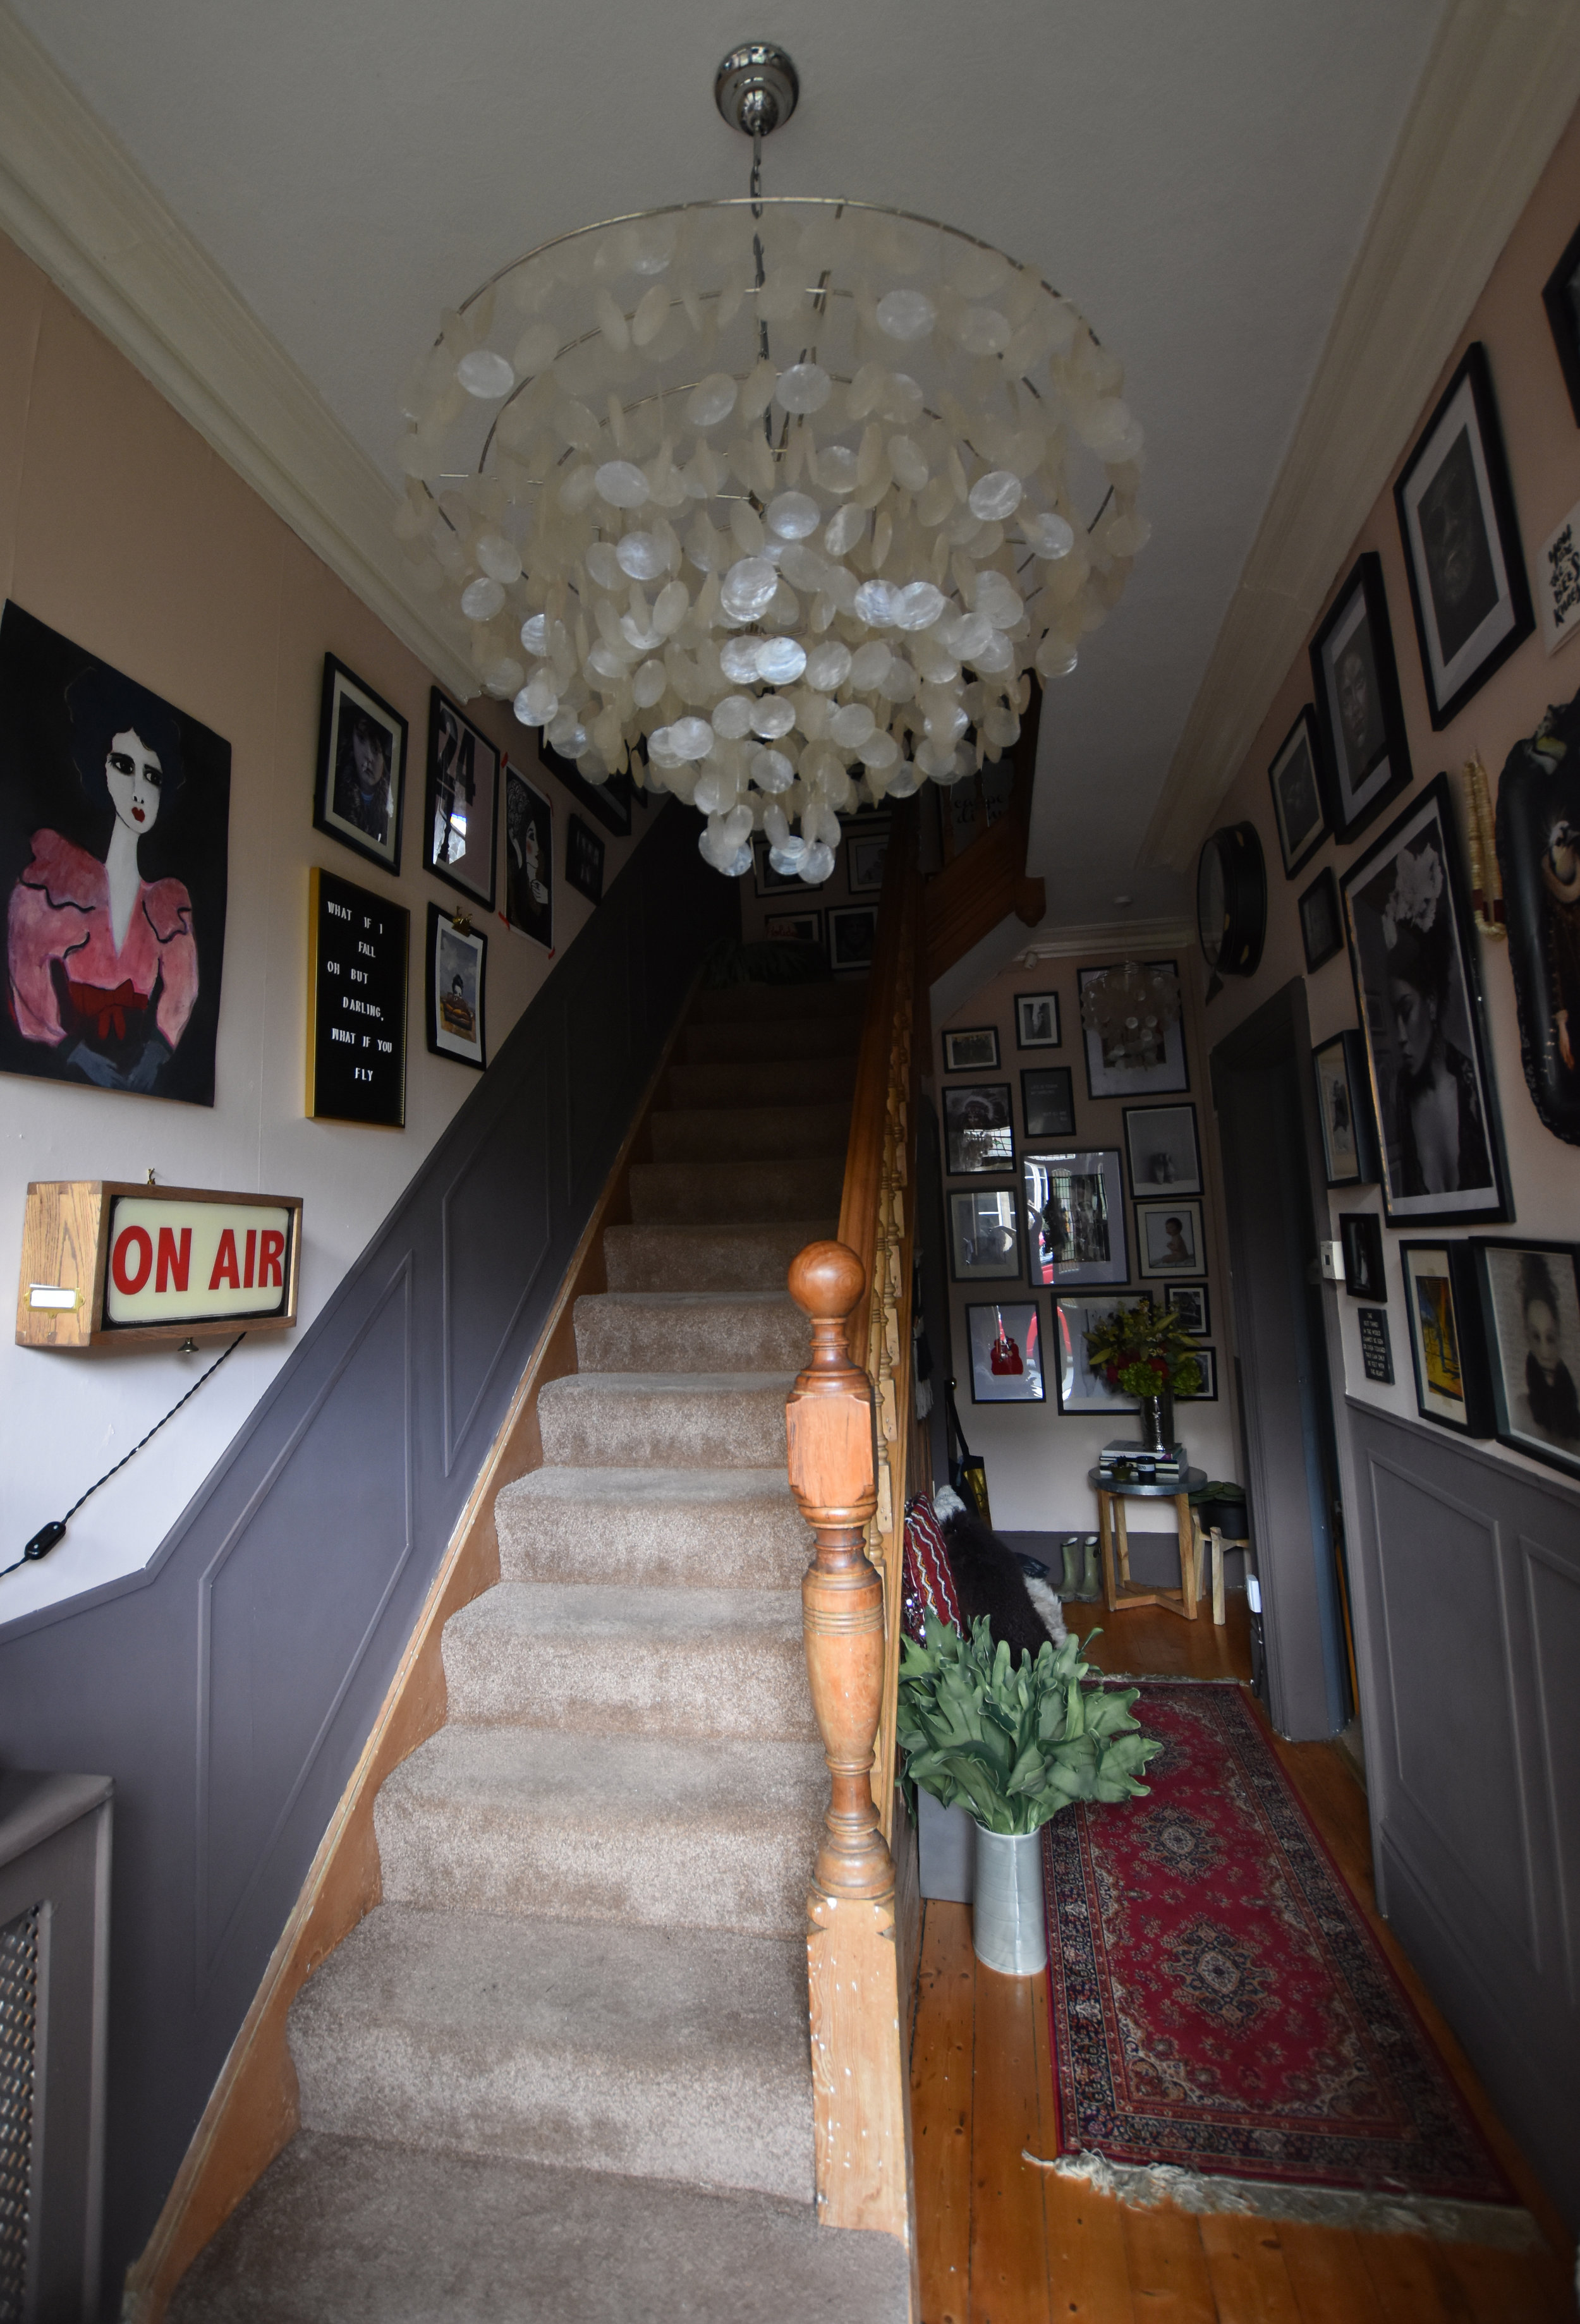
The Hallway, the first thing someone sees when they enter your home, the area of heavy traffic and with two young boys, the place shoes get dumped, walls get bashed as school bags are swung on the way out the door and as friends battle to be the first up the stairs on a playdate.
Mine was looking tired, the wallpaper I had on the walls was scuffed and so I decided it was time to tackle the decoration. This is not said lightly, the ceilings are 11ft away from the floor and to reach the top I often am at full stretch. I knew it was going to be a big job, but equally there was no better time for it, with a busy Autumn on the horizon.
So, I set about tackling it over a couple of days on my week off. The boys were at camp and I could have sat down with a book, but I find doing something creative, allows me to switch off, to adjust into holiday mode from a very busy normal week.
Now, many of you will notice, that my colour choice is different to normal, I haven’t gone for a dark colour! Yes, in a departure for the norm I chose to go for a lighter shade; Setting Plaster by Farrow and Ball. I still firmly believe that for me, dark colours create the look I want in certain rooms; the cocoon I lean towards as a place to relax when I come home from work, but in my hallway, which granted has high ceilings but which is also pretty narrow, I found the dark brown I had on the walls, just wasn’t giving me the vibe I was after.
I also wanted to try some faux panelling on the walls, something I had tried in my bedroom makeover, with a reasonable degree of success. You can read all about that here.
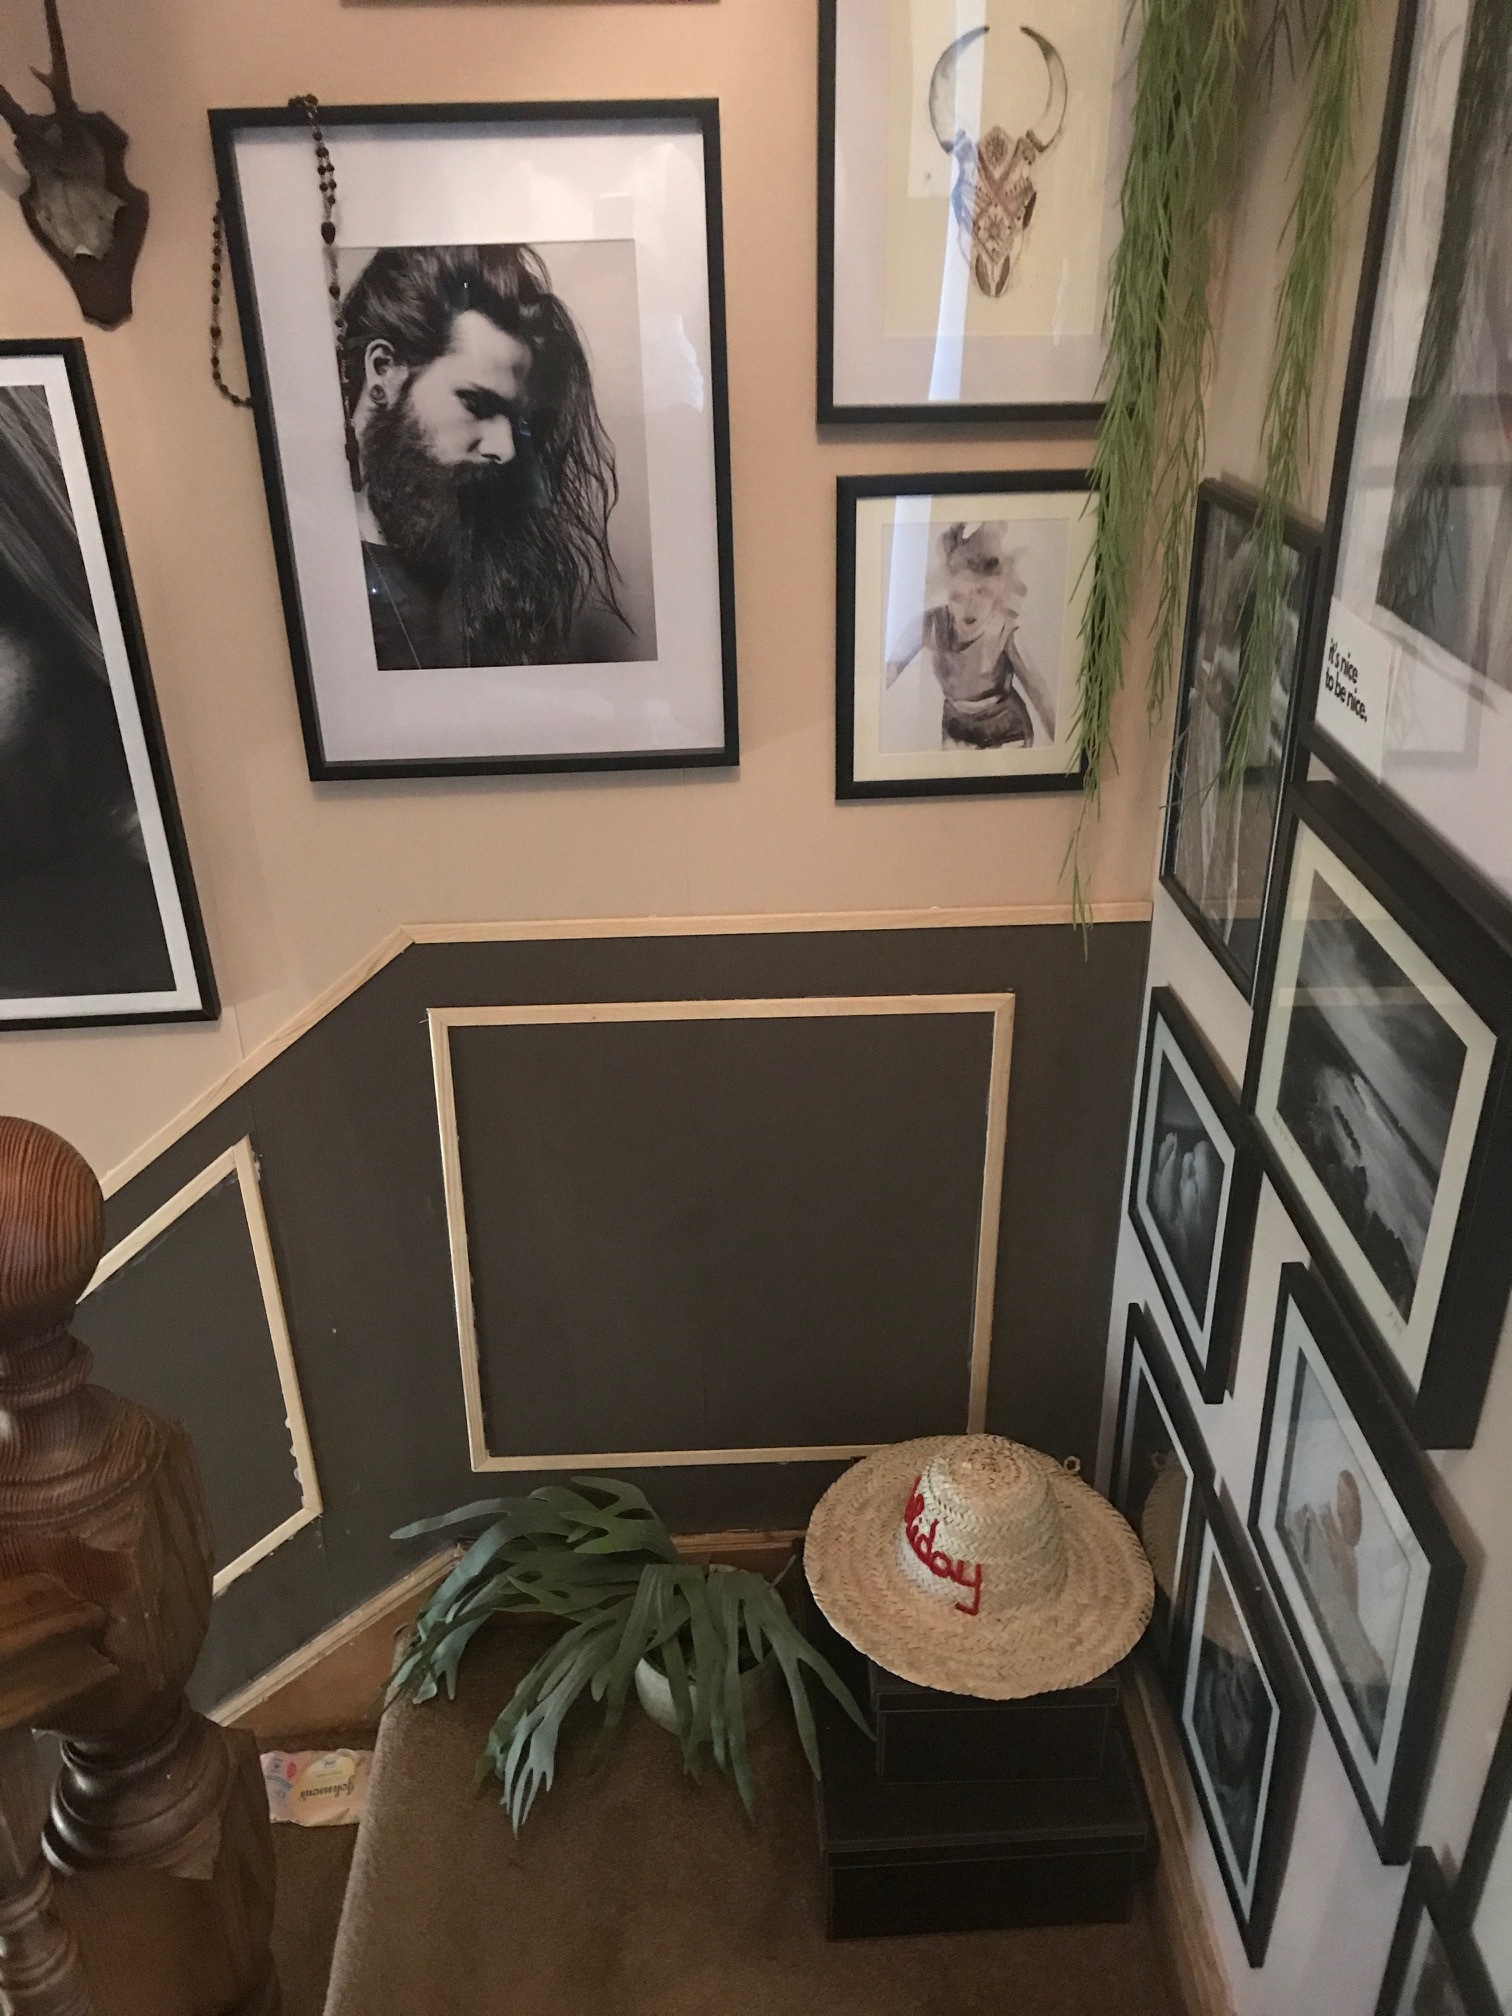
So, I decided on a two-tone idea. A dark colour on the bottom of the hallway; Crosby by Abigail Ahern with panelling and a lighter colour on the top, which would also allow me a great backdrop to create a huge hallway gallery wall. I am an avid collector of art and what better place to showcase it and create interest than in your hallway (I will pick up styling a gallery wall in another blog post soon).
I have to keep the banister in the original wood colour; this is a non-negotiable with my husband (one of the very few things he has an interior opinion on), because the original panelling looks beautiful paired back, and even though the banister is somewhat bashed (as you will see above), this is what adds character to our home. It is character which drew us to this place after all, and I certainly don’t want to strip my home of this. The colour also matches the sanded floorboards so broadly speaking I was comfortable leaving it as it.

The painting took two days to do, and admittedly left me unable to move much; a solid 8 hours of step classes would feel like the equivalent, but once the base colour was on I could set about creating the panelling, which I am now going to walk you through.
This panelling was done differently to the panelling in my bedroom; in some ways, it was easier. I chose simple pine beading with a curved edge on one side. This is available in 2.4m lengths from B&Q for around £2.99.
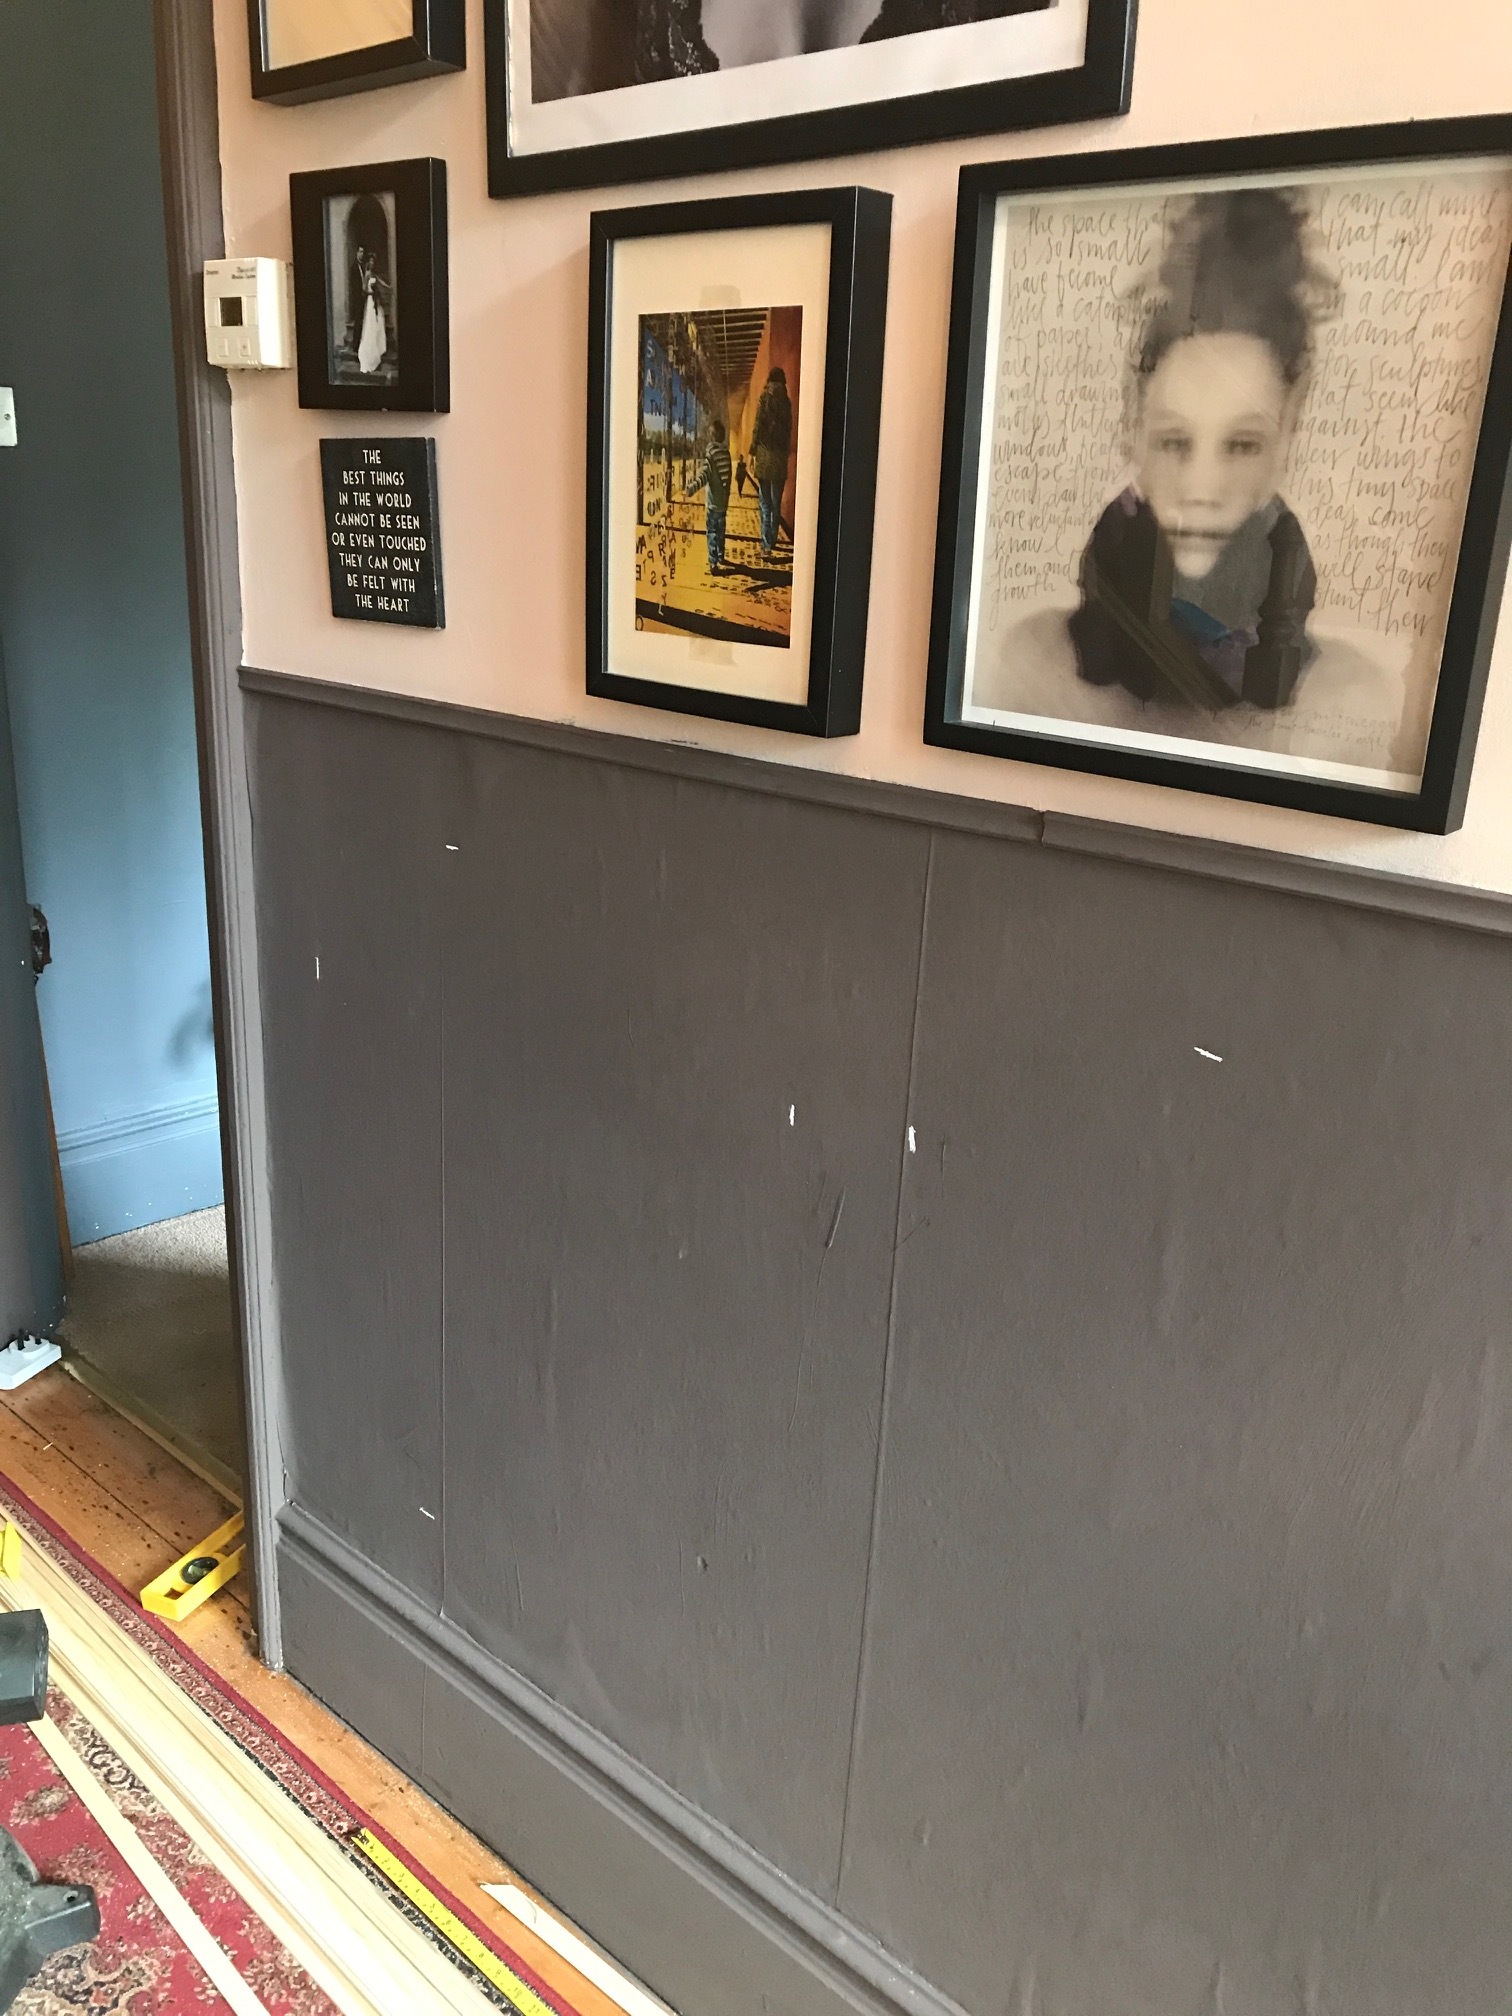
I marked out the wall as you can see in the middle picture below with white chalk, having measured it first. The stretch is 2.9 m long and I wanted 4 panels, 10cm apart, so I took 50cm (5 gaps, 1 at each end and 3 between the panels) from 290 to get 240cm and divided by 4, to get 60cm. I needed 8 pieces of wood cut to 60cms (two pieces for each panel and four panels). The wall was 90cm high so I took 20cm off this and got 70cm; I needed 8 pieces at 70cms, and so on.
Because I was going to have to cut an angle of 45 degrees so that the wood joined seamlessly at the edges (with bit of filler), I created two pieces of 60cm and 70 cm as my guides and marked the lengths based off these originals. The wood needs to be cut at 45 degrees on both ends.
My husband’s saw allows me to set an angle for cutting, which is useful even if I am constantly worried about losing my fingers.
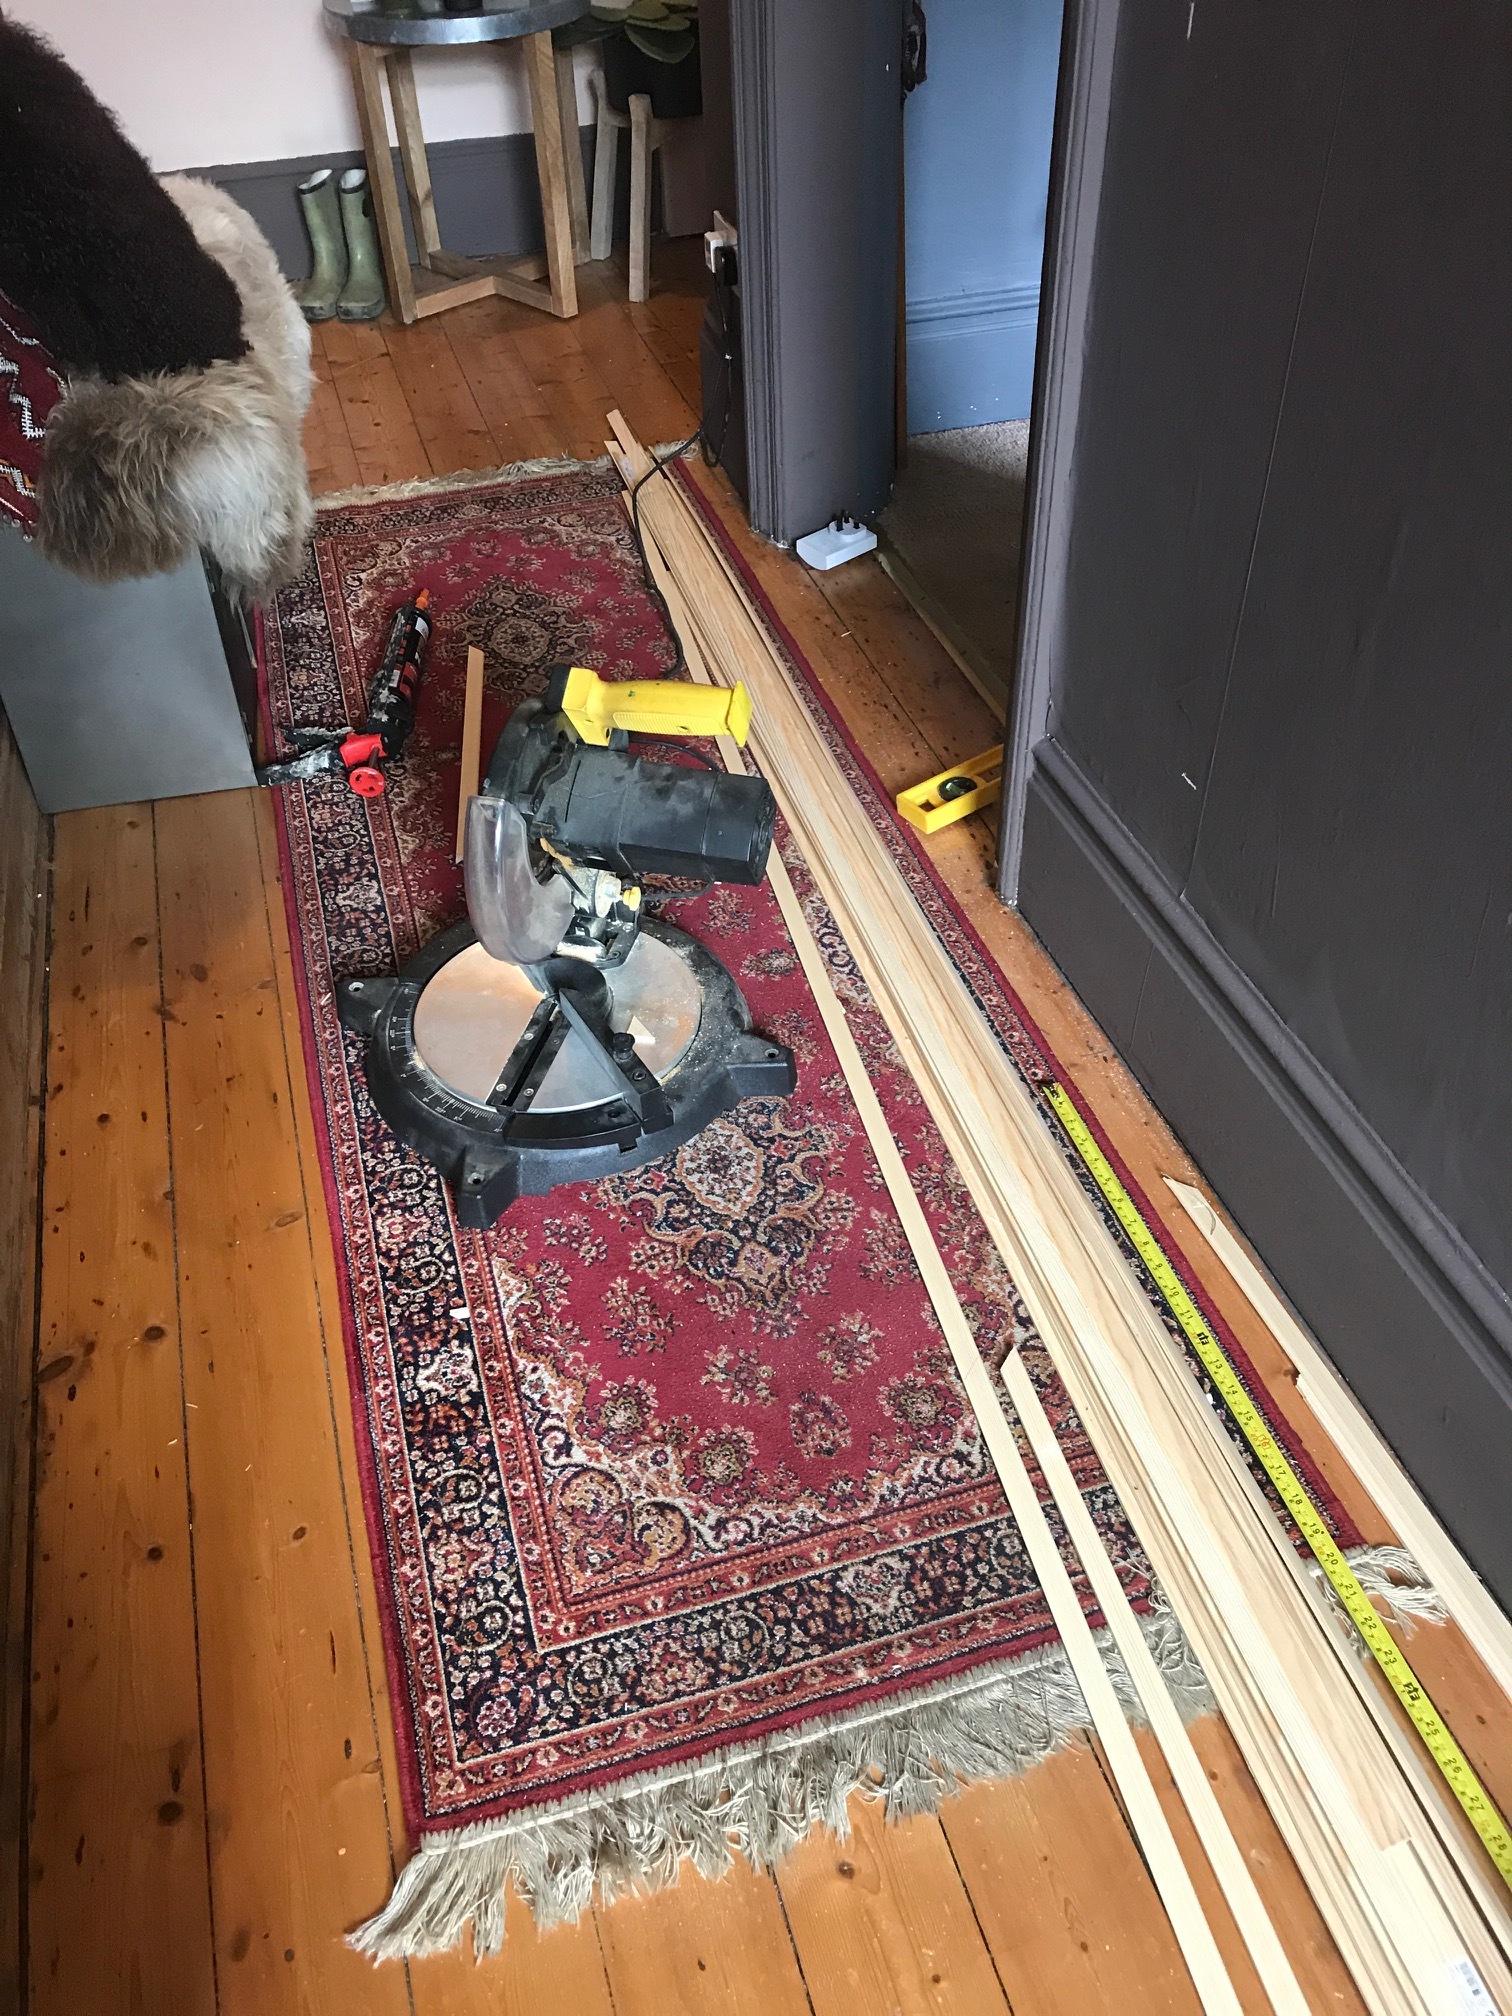
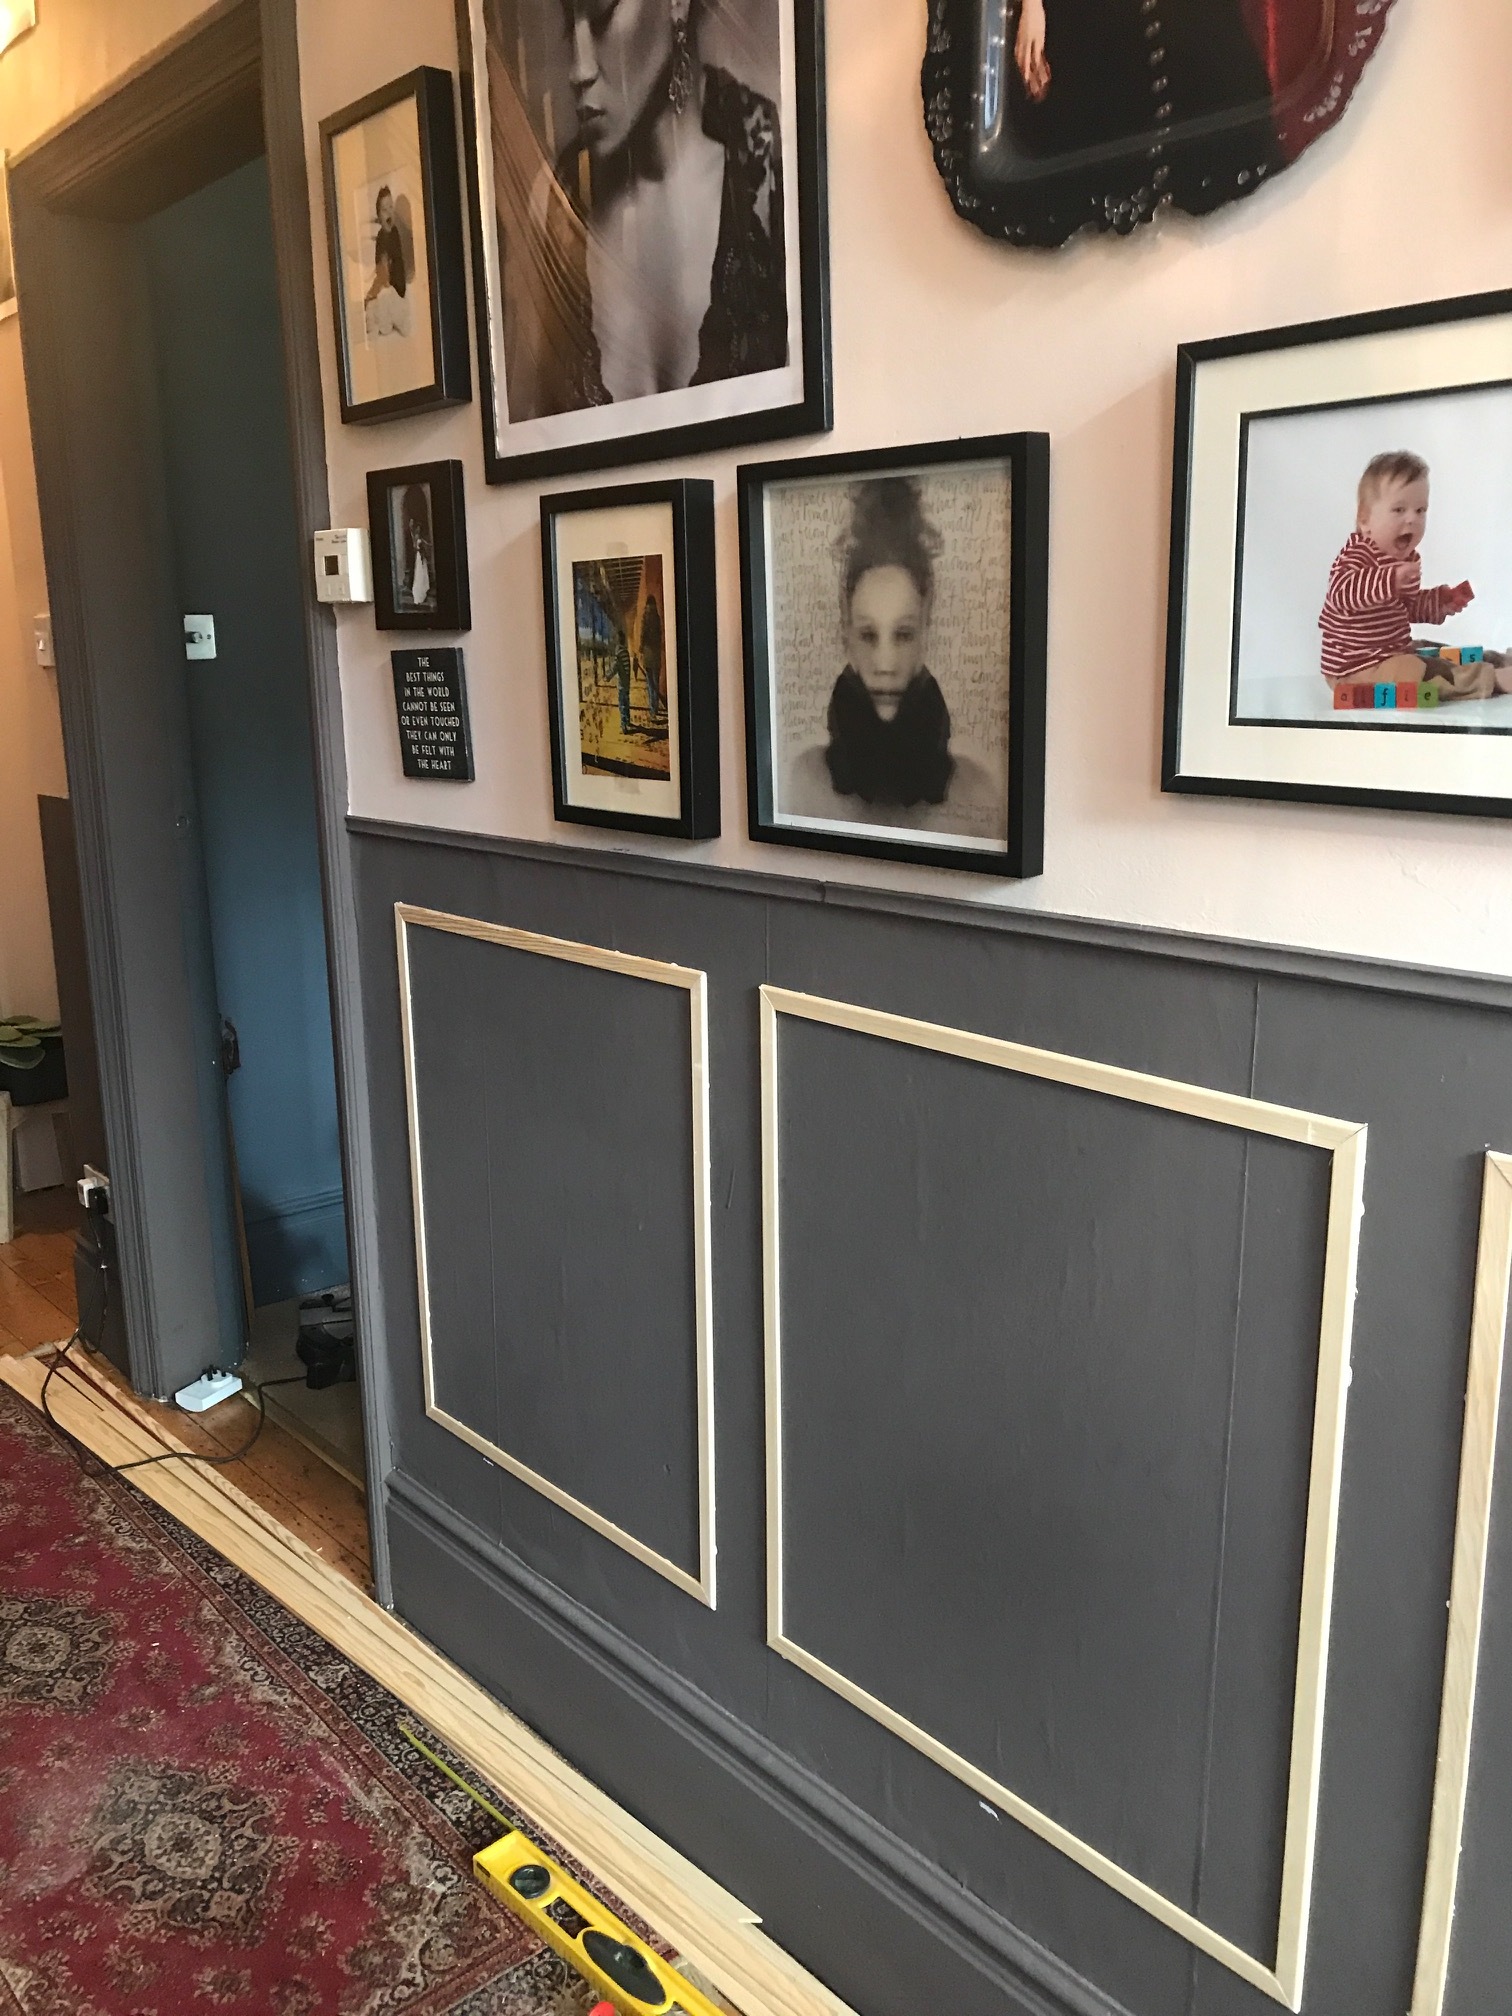
Once I had cut 8 pieces of 60cm and 8 pieces of 70cm, I simply used a grab adhesive on one side and stuck them to a wall in a rectangle shape, being careful to always have the slightly curved edge on the outside.
Once the adhesive had dried, I filled any small gaps with a quick drying filler and then painted the wood the same colour as the wall.
I also ran a piece of beading right the way along the top of the brown wall to finish off the look.
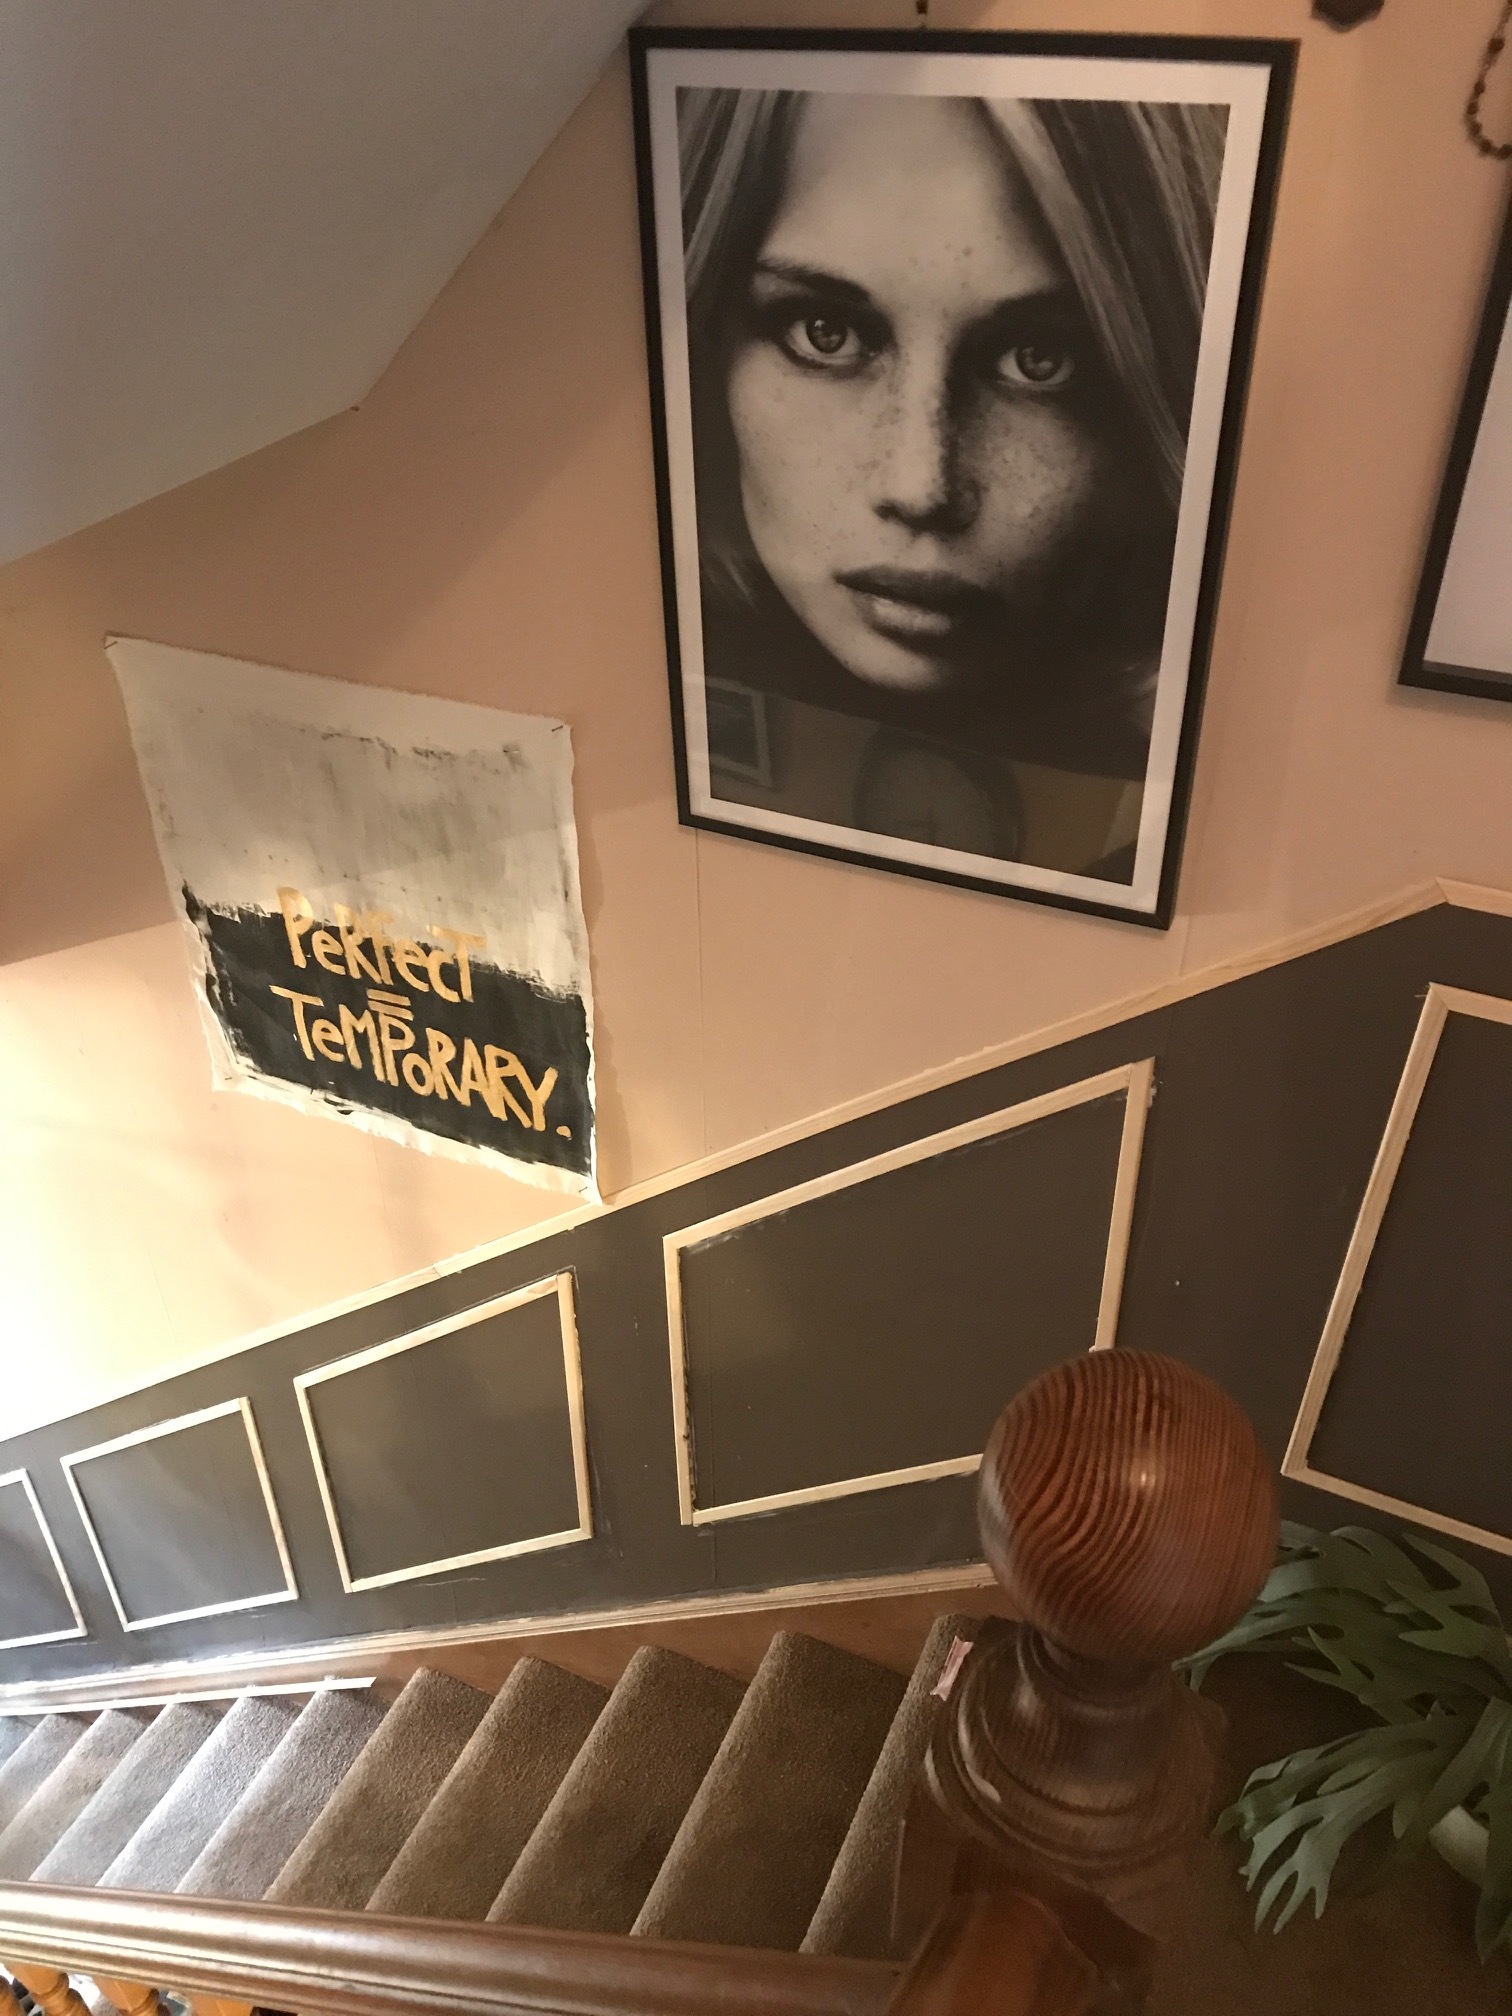
The hard part to panel was the piece going up the stairs, because the angle needed to be the same as the stair banister, to stop the room looking off kilter. However, once I had measure the two angles it was exactly the same process for carrying out the work, create two guide pieces and then cut based on those to create two lengths of 60 cms and two of 70 cms for each panel, stick, fill and paint.

So, there you go, quick, simple and achievable faux panelling. The total cost of mine was just over 30 pounds not including the paint, which I already had, having painted my walls.
I’d recommend you do the maths before heading out to buy wood. Work out how many strips of, in my case 60cm and 70cms you need and then add them together. Also work out if you want to do a long strip along the top, and because you are cutting angles there will be wastage so buy a few extra (I bought two extra strips).

I have been nominated in the category of Best Newcomer for the Amara Blog Awards. If you enjoy this blog and would like to vote for me you can here.

The Girl with The Green Sofa


