

How To Up-cycle Furniture to give a Vintage Look

I have had a few requests for a blog post on how I created my table in my dining room, to give it the aged look you see here, and so here is a step by step look at that process.
I started up cycling furniture 20 years ago, while living back home at my parents while studying. I got hooked on a local antique place that auctioned furniture every Saturday and would spend hours browsing for things that I liked. I quickly realised that if I really liked something, most other people did too and so on a student loan with a Saturday job for pocket money, I was not able to buy them, or bid nearly enough. However, finding the items that were cheaply priced, largely because they were painted, say a lurid pink, gave me much more success and I began blind bidding on a Saturday (while I was working my Saturday job) and rushing back home to see if I'd won. I did win quite a bit, most items for a fiver or under and so I had to start rolling up my sleeves and learning how to up cycle them.
The first step in that process is learning to remove the old paint and here nitromors became my friend. You can buy it at any hardware shop but you will need protective gloves, clothing and goggles and unless like me, you are using an outdoor garage as I was back then, something to protect your floors. You will also need a paint brush, with which to apply the nitromors and sanding block and wire wool. Some recommend using a scraping tool (I have in the past) but I find the wire wool does a much better job for me. You will just need to clean it regularly with white spirits or buy a fair bit as it gets clogged up fast.
Here is a list of the key things you will need:
-nitromors, wire wool, sanding blocks, white spirit, paint scraper, protective gloves, clothing and goggles, a floor mat, and wax (coloured and clear).
To remove paint, you will need to apply a thick coat of nitromors all over the item, as shown in the picture above, leave it for 5-10 minutes until it starts to bubble, and then use the brush and rub it into the paint. I usually apply some more at that point to keep the surface moist and then leave it for 30 minutes to work.
At this point I come back and using some wire wool, rub the surface until the layers of paint start to come off. Here is my first pass below.

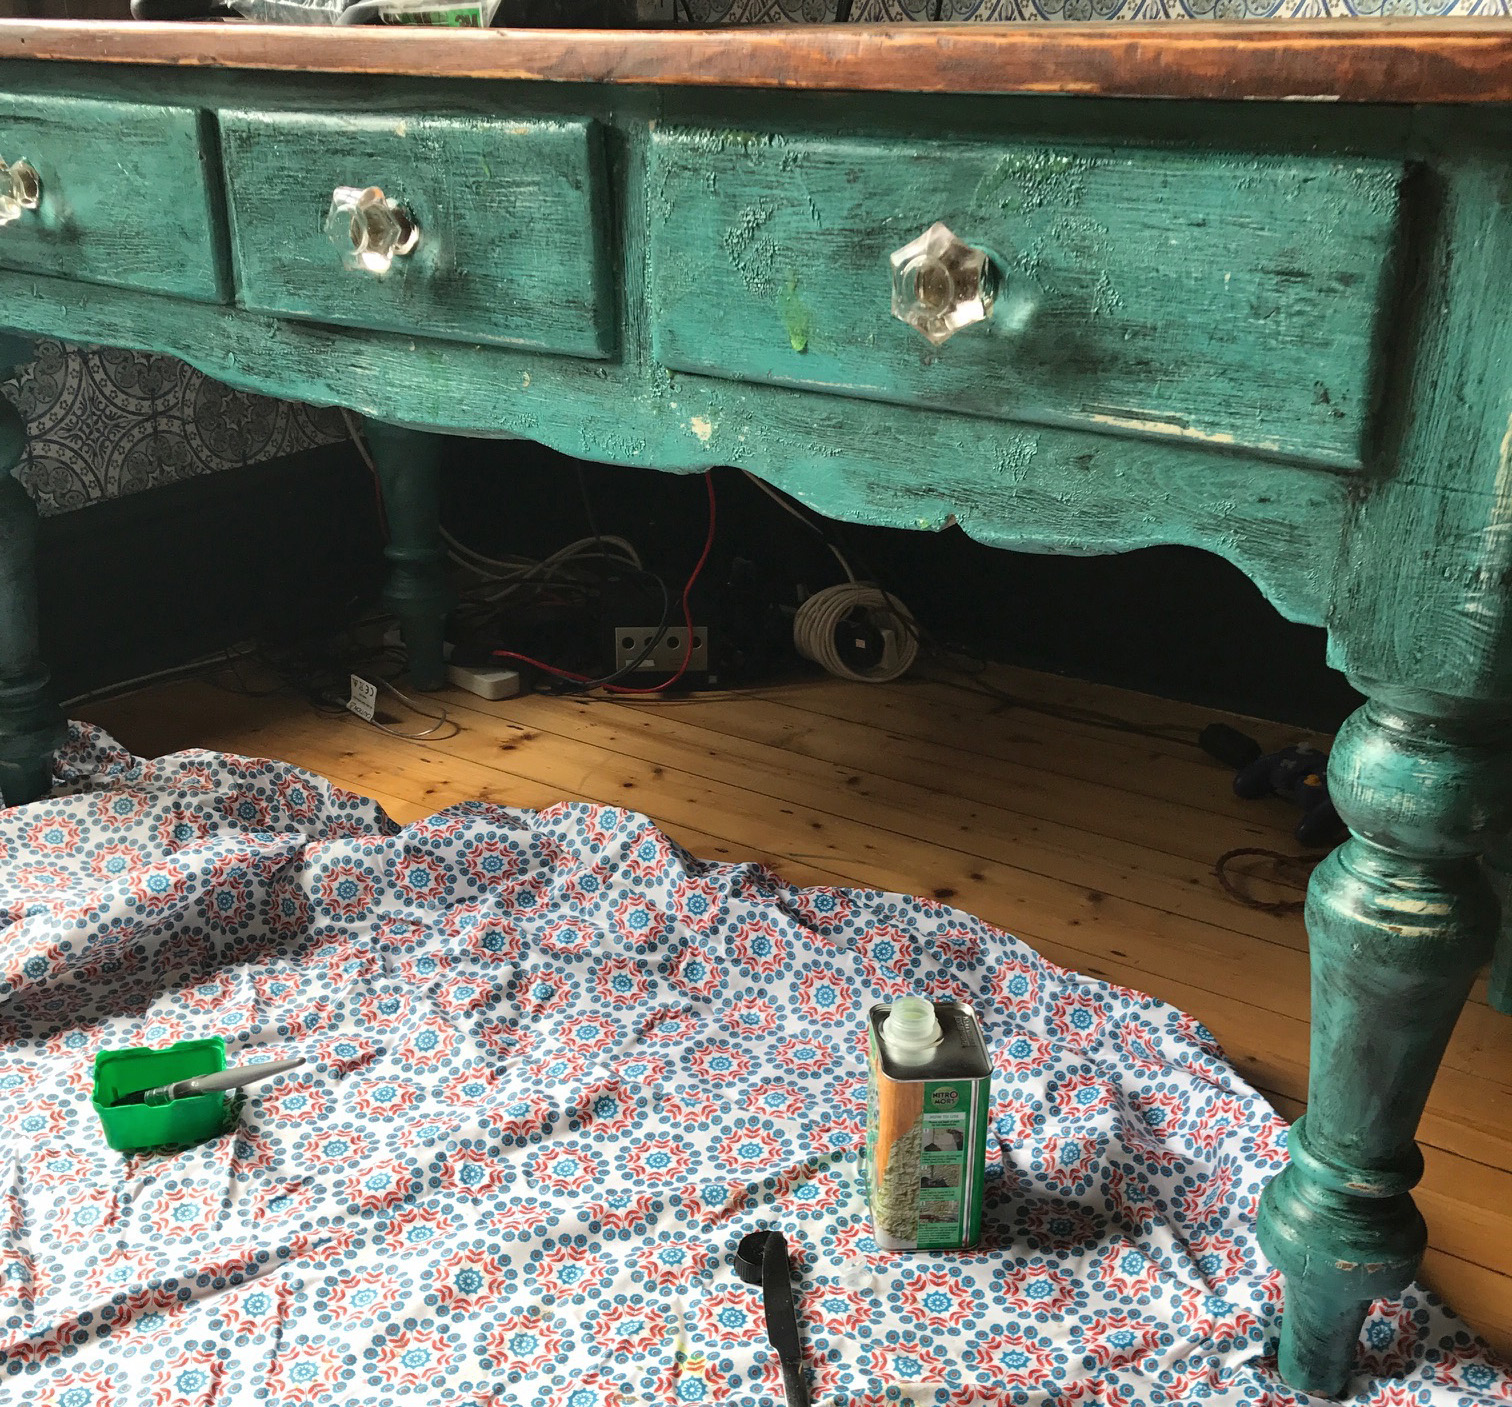
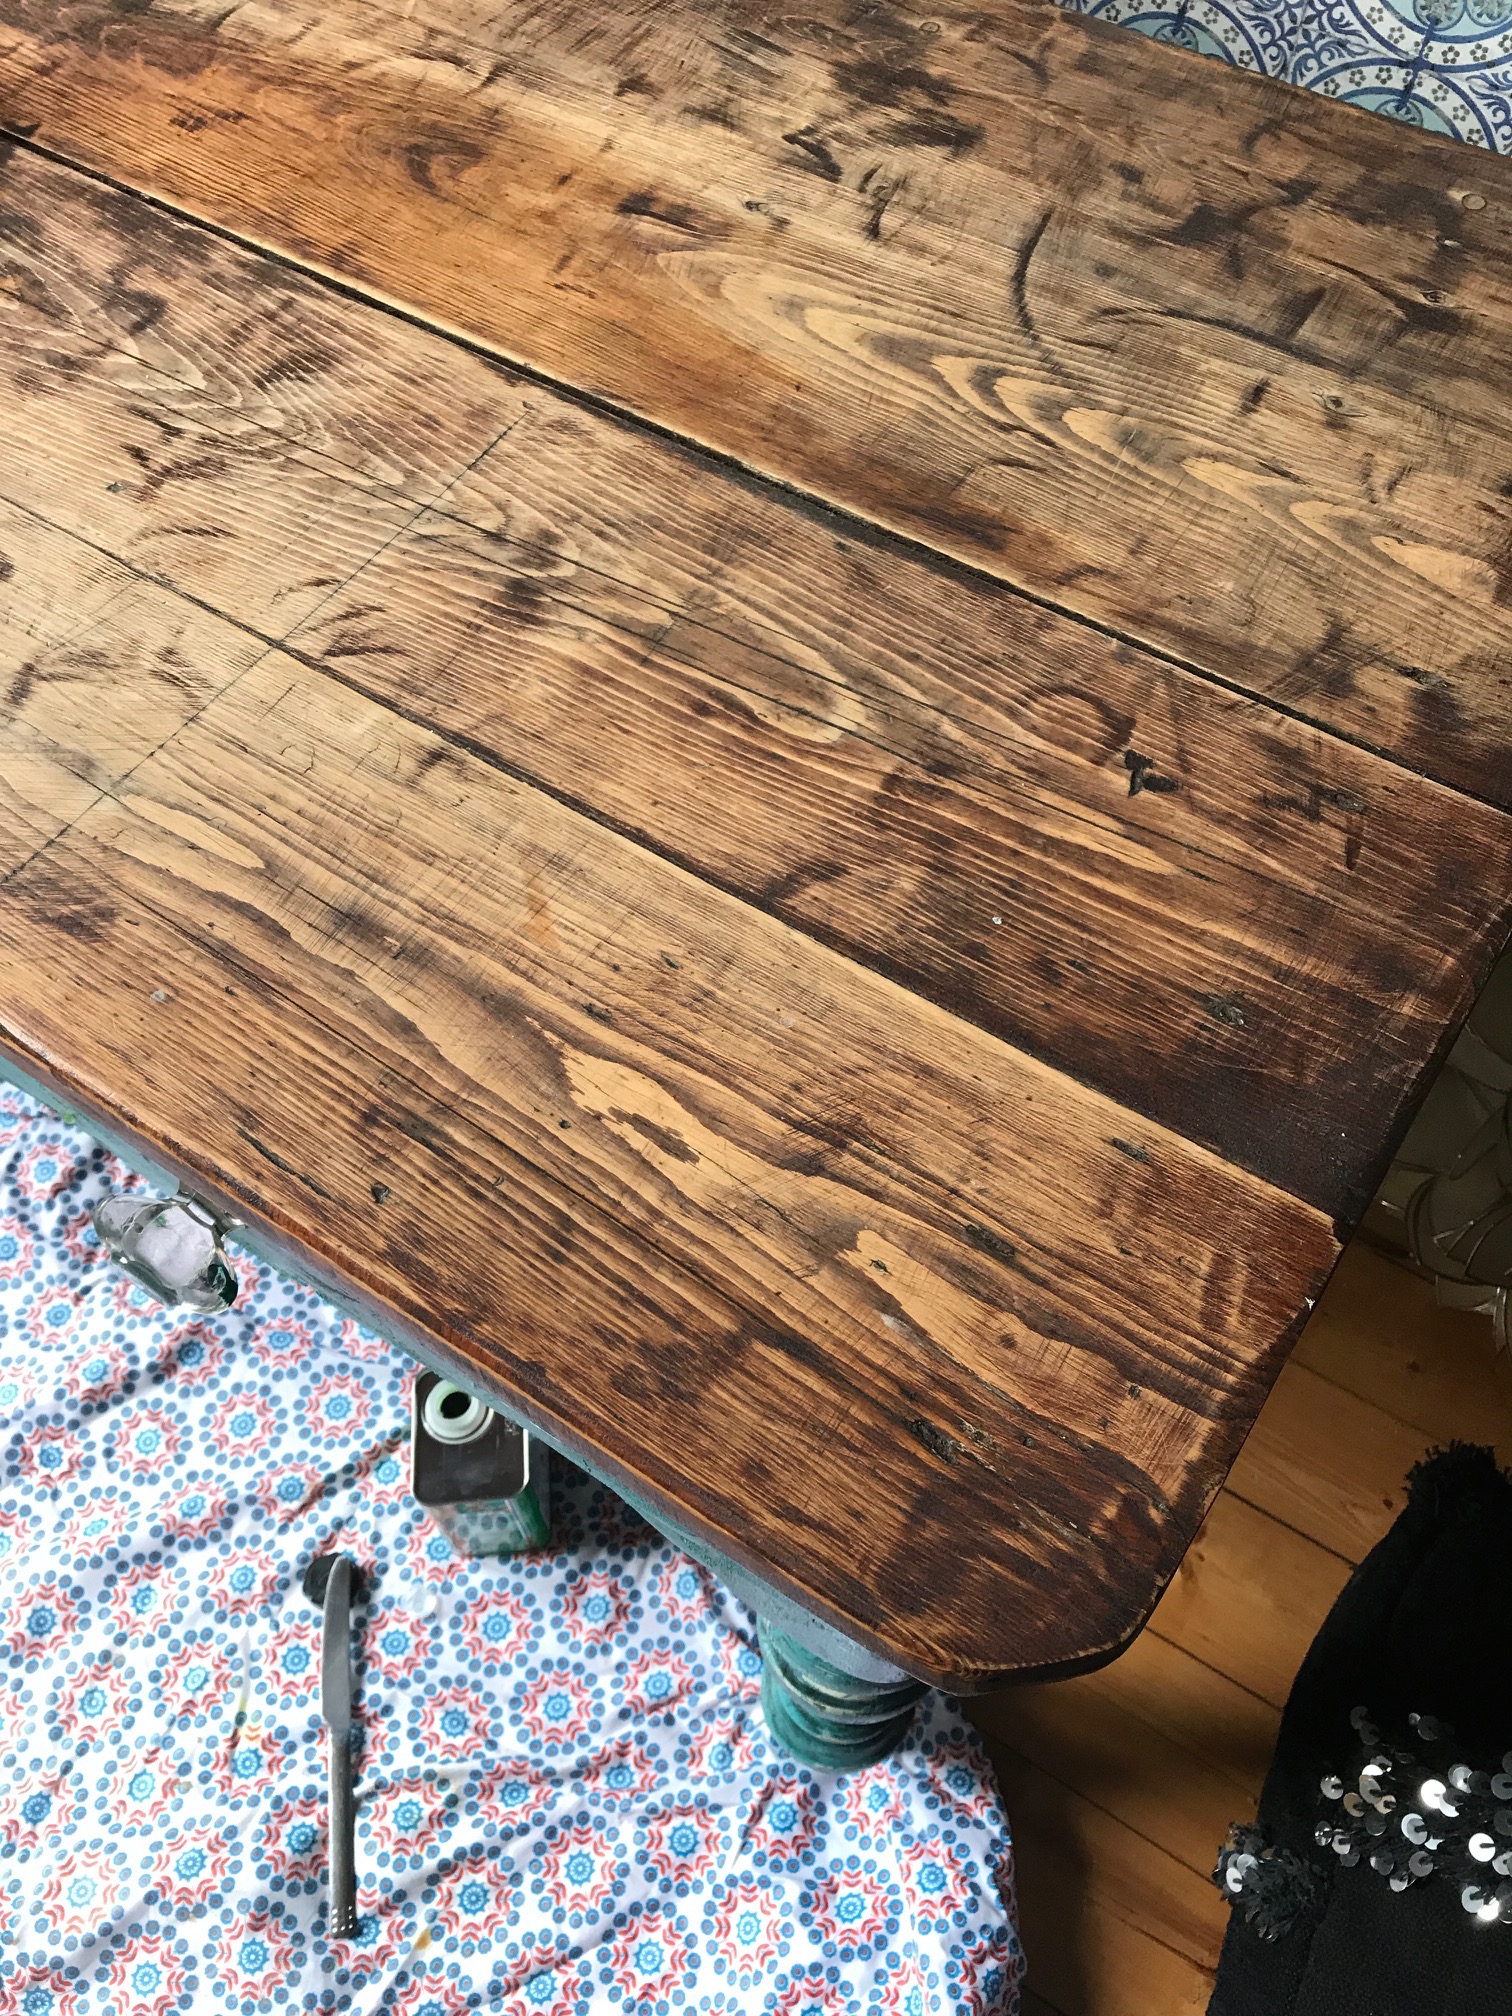
Now, the decision on what finish you want will drive how many more applications of nitromors you wish to apply. My table top below was stripped right back to the wood, here I applied 6 coats of nitromors and sanded thoroughly between each course.
But, for the main body of the table, I just wanted an aged look, like the paint had just gradually work off over time, and so I only applied two more coats until I reached the point you can see in the picture below. I focused on adding nitromors to the wood bits showing through to give a real contrast to the paint and sanded these thoroughly several times.

Once you are happy with the finished look, you need to clean the item with white spirits to remove any residual nitromors, remember you still need you gloves and protective clothing and goggles. Once the item is thoroughly clean you can start the finishing process.

Back during my time in my Dad's garage, while playing around with different looks, I discovered coloured wax and I will get more into that shortly, but needless to say it is great for giving different finishes to paint. Annie Sloan sells a wide variety on her website www.anniesloan.com. You can choose just to apply a clear wax to finish an item but I like to use a brown wax to add age, you can see the contrast above. I use a black wax if I want to give an industrial look to an item, but here I just wanted the table to look a bit grubby as if from years of use.

Above is my finished item, with two coats of brown wax applied and then left to harden between each coat. I have not applied a full coat of coloured wax, choosing to focus on little areas, where you might expect age and leaving the other areas clearer. Naturally how you choose to do this is down to the finish you want. The combination of a mixed application of nitromors and a mixed application of wax, gave me the aged look that I wanted.
To finish it all off I applied two coats of clear wax to the whole surface to protect the item from spills and the kid’s food splatters.

And here is the finished item, above with my old wallpaper and below with my newly decorated room, using wallpaper from Lucy Tiffany, more on that in a blog post in due course.


The Girl with the Green Sofa


